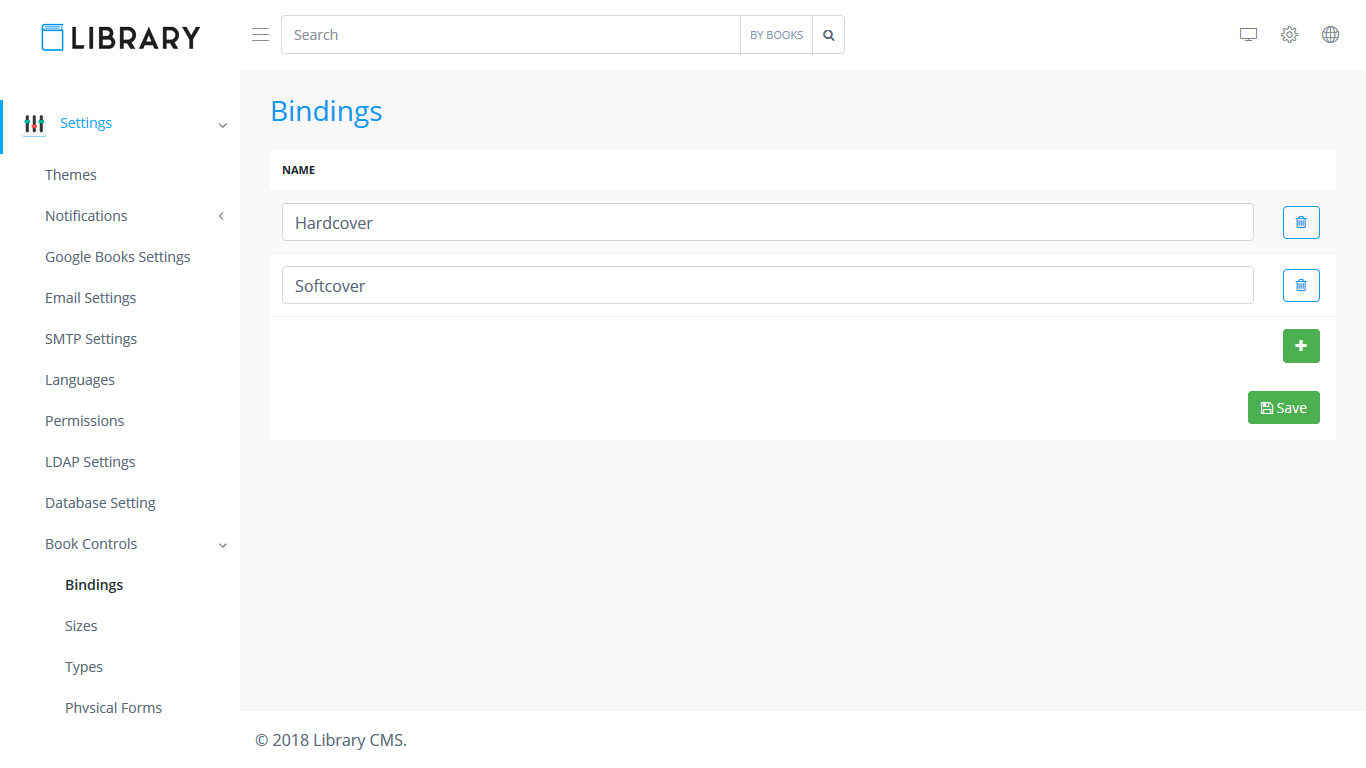
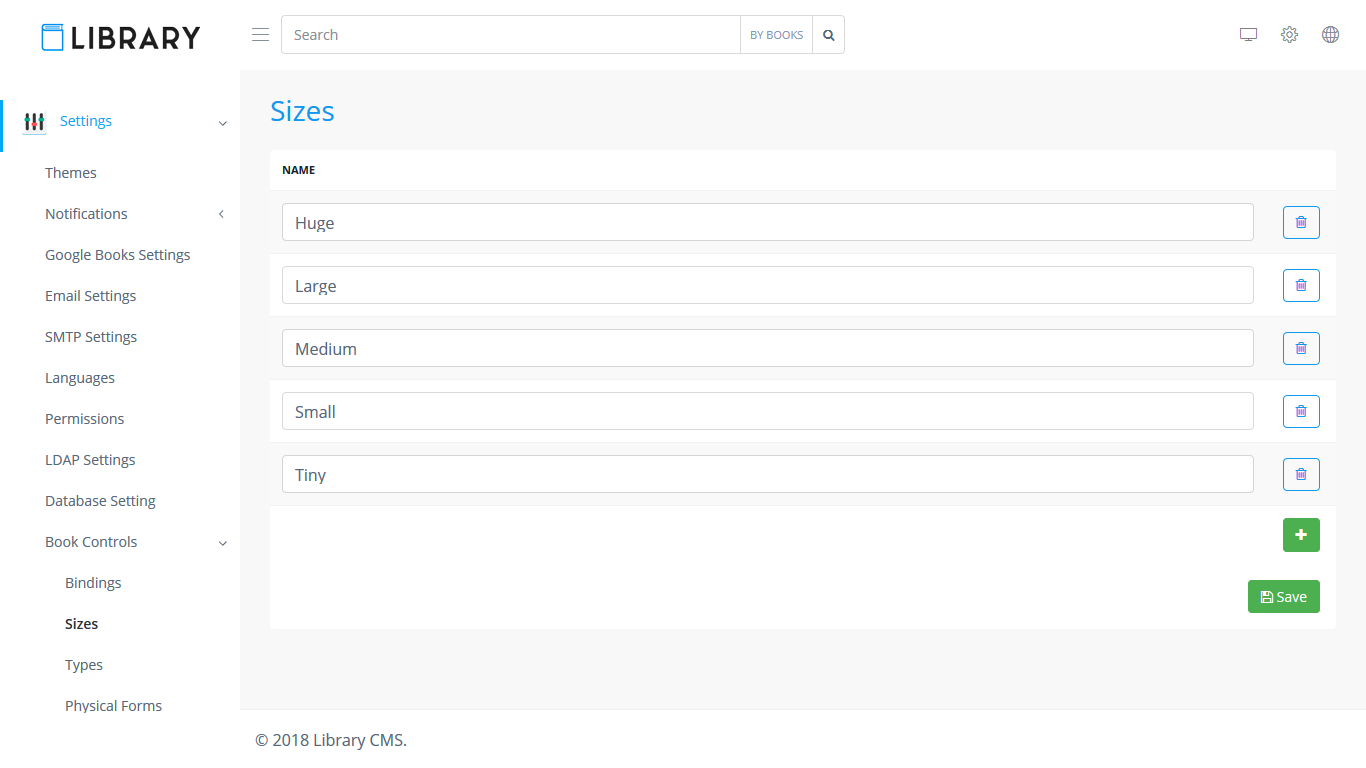
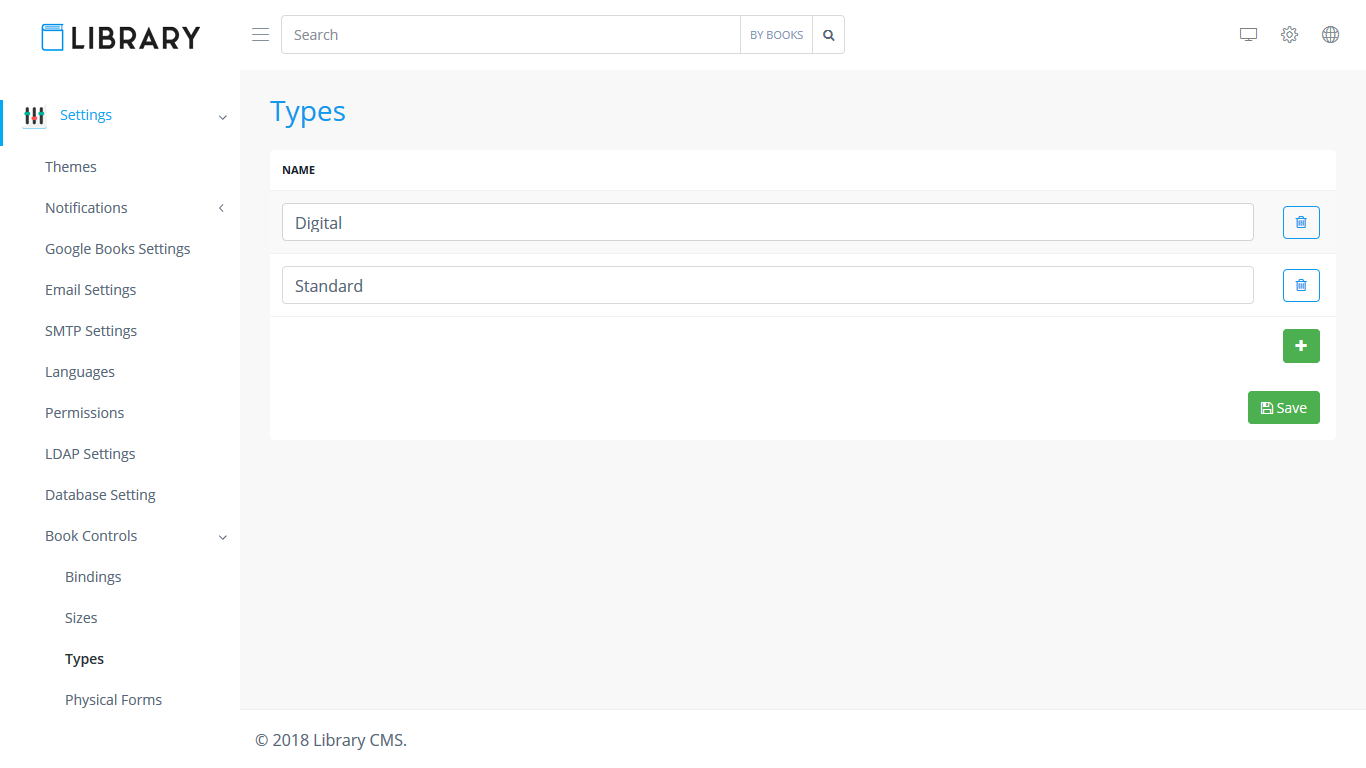
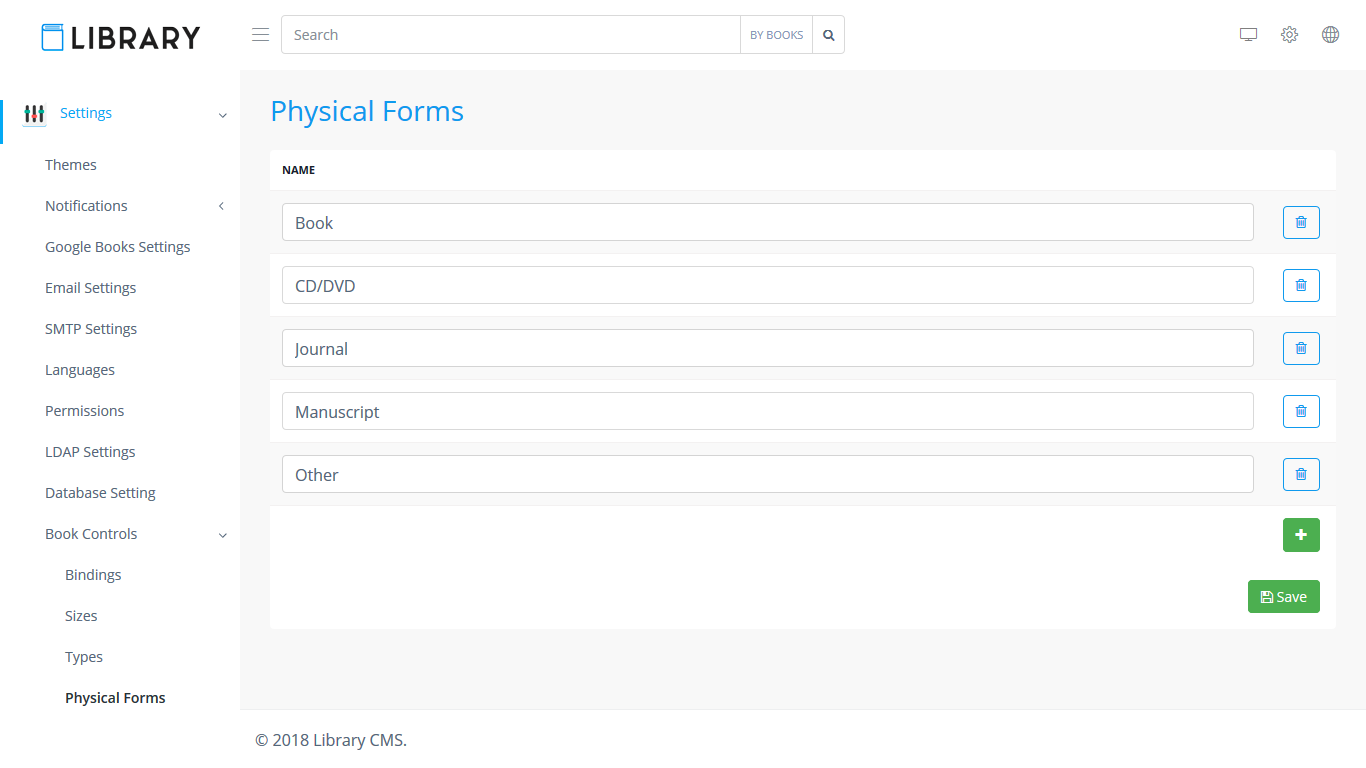
Settings

Add/Edit Email Notification
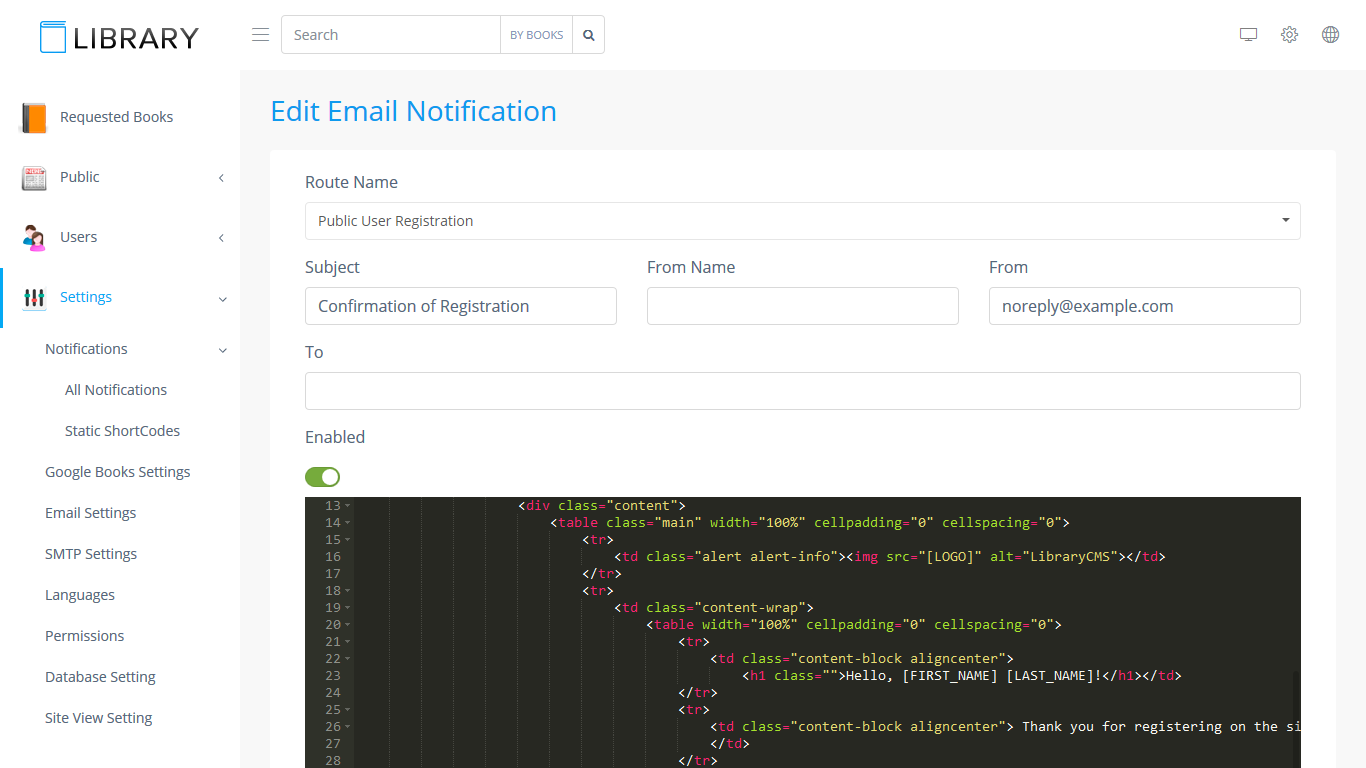
To create email notification you have to use following page. First of all email notification should be linked with specific page (Route Name). Then some email properties need to be specified:
- Subject – email subject.
- From – sender email address.
- To – recipient emails separated by semicolon symbol ";"
In the end you have to create email template by using html code and some short codes – values inside of brackets [ ] that will be replaced by real values. List of static codes is different for every page.
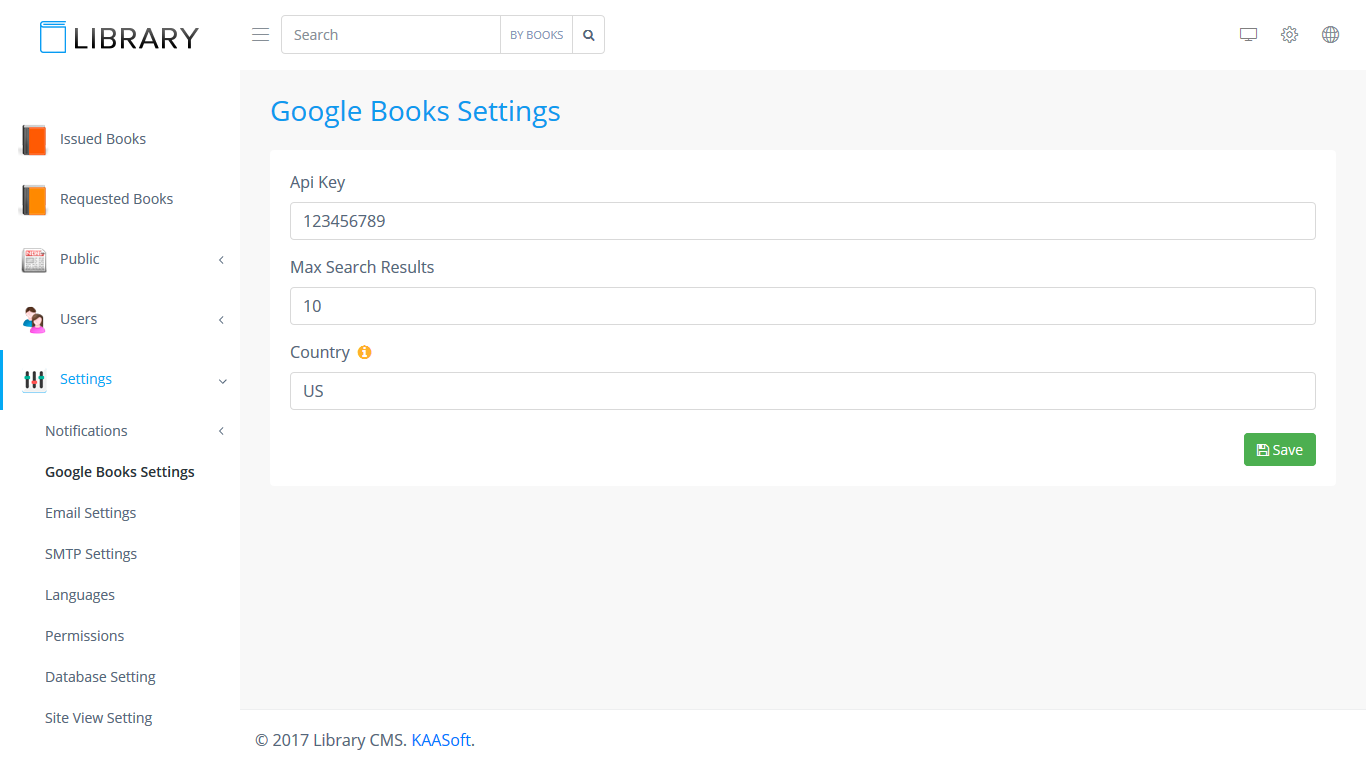
Google Books Settings
You can create new books by importing data from Google. Here should be specified setting for Google Books API. To use Google Books API you have to generate your own API key (see https://support.google.com/cloud/answer/6158862 about Setting up API keys).
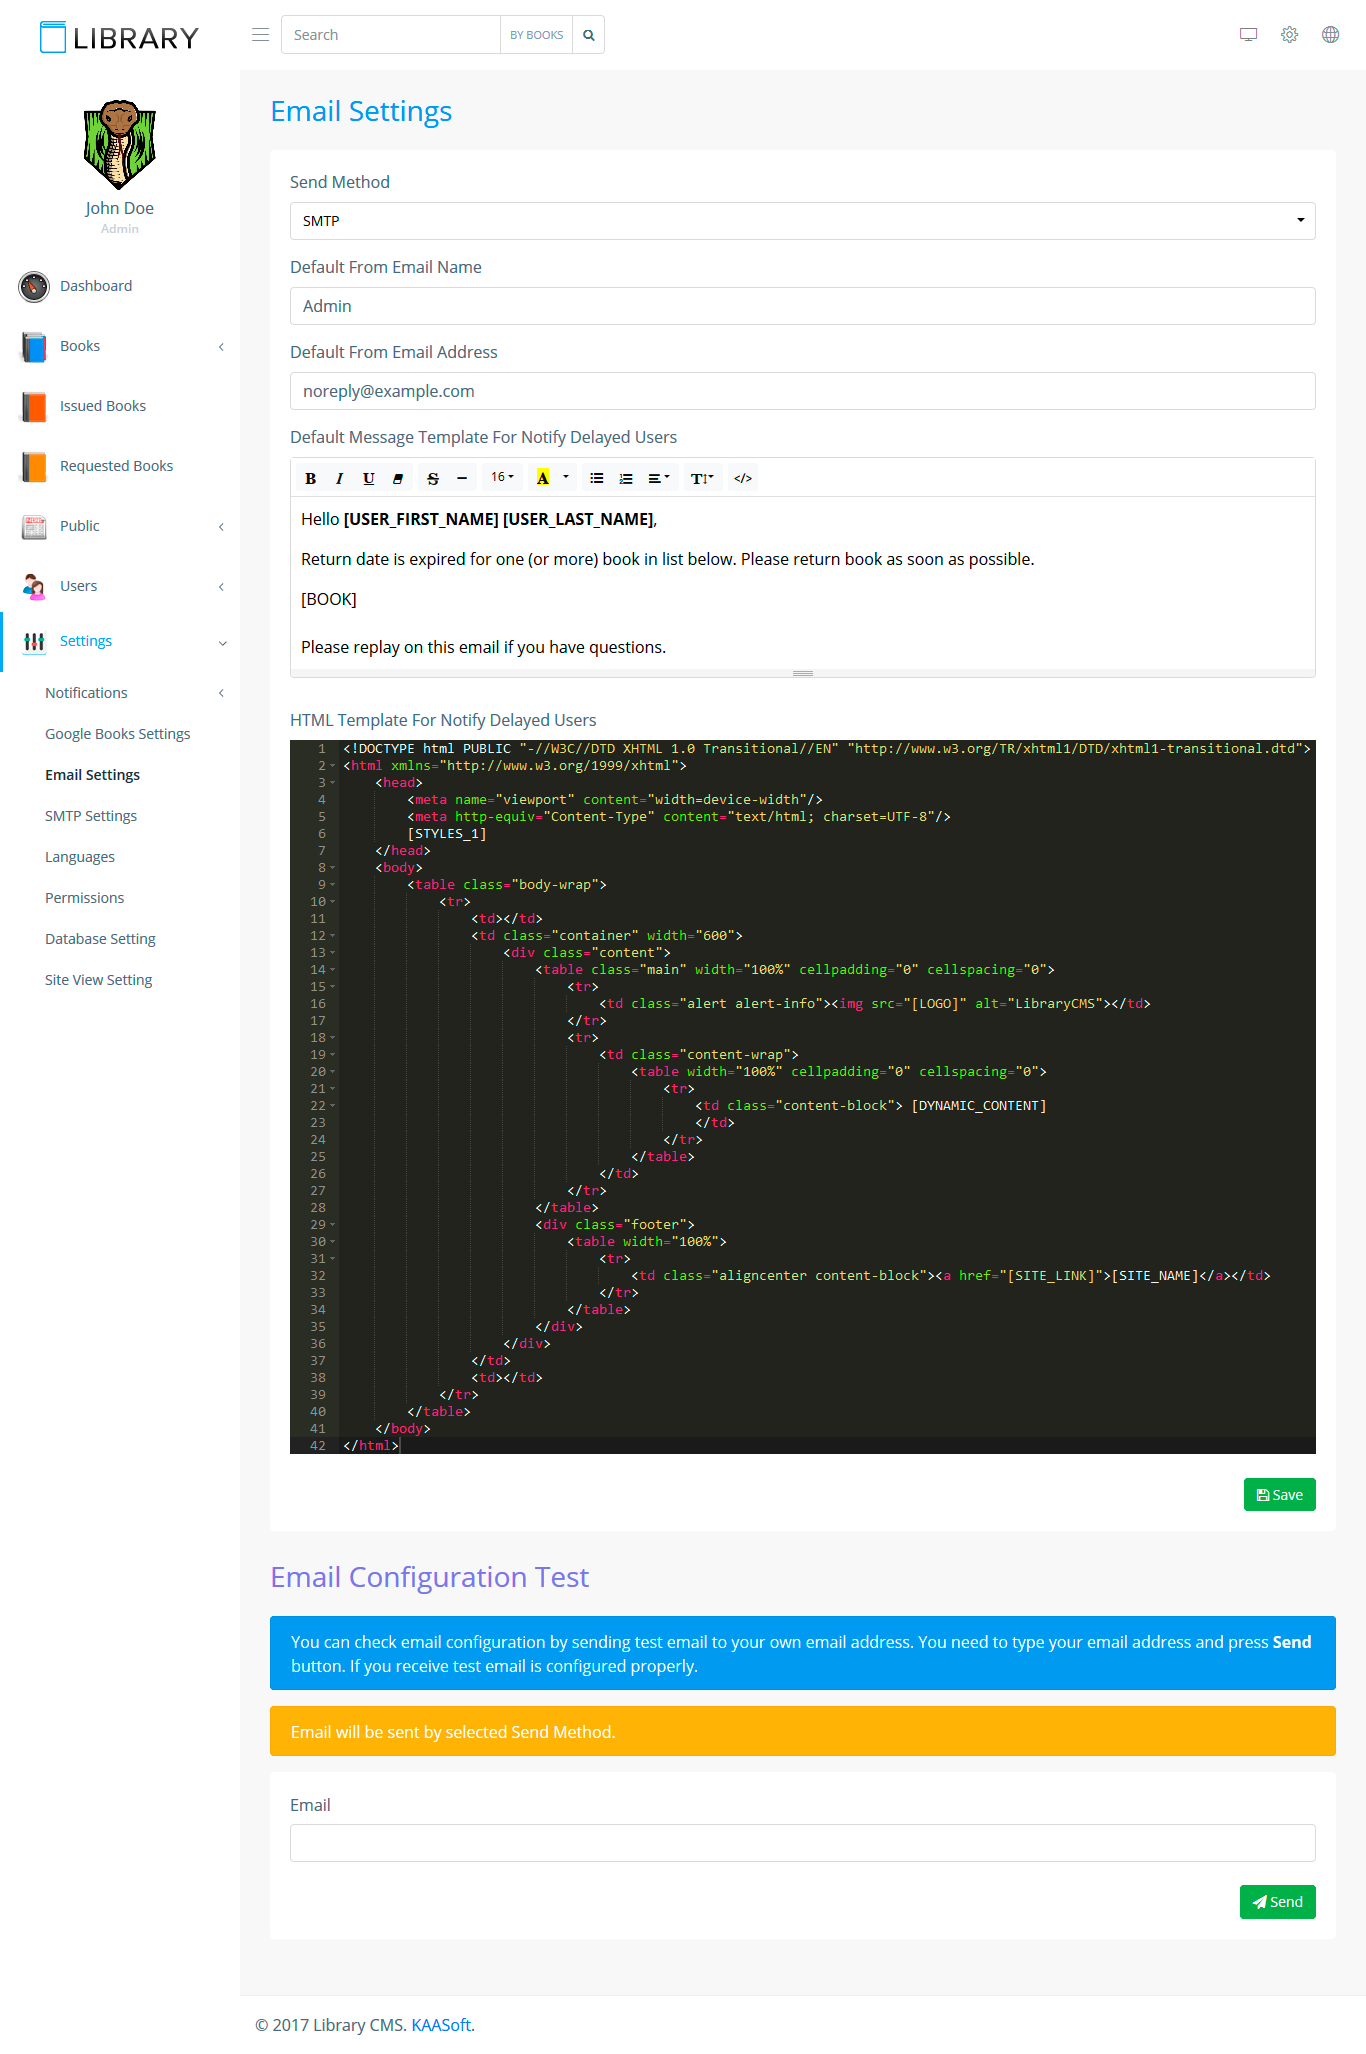
Email Settings
This is global email settings page. It contains 2 parts:
- Settings
- Test settings
Settings include Sending Method (it can be SMTP or PHP Mail), default sender email and sender name, template of email to notify users who delayed books. You can see 2 templates:
- Default Message Template For Notify Delayed Users – this is template for quick editing of email content. It will be pasted in next template instead of short code [DYNAMIC_CONTENT].
- HTML Template For Notify Delayed Users
When you will send email to delayed user email content will be combined following way:
- Get HTML Template For Notify Delayed Users code.
- Replace [DYNAMIC_CONTENT] inside of HTML Template For Notify Delayed Users by Default Message Template For Notify Delayed Users.
- Replace all another short codes in result html code.
- Send email.
After setting up you can check email configuration by sending test email to your own email address. You need to type your email address and press Send button. If you received test email it means email is configured properly.
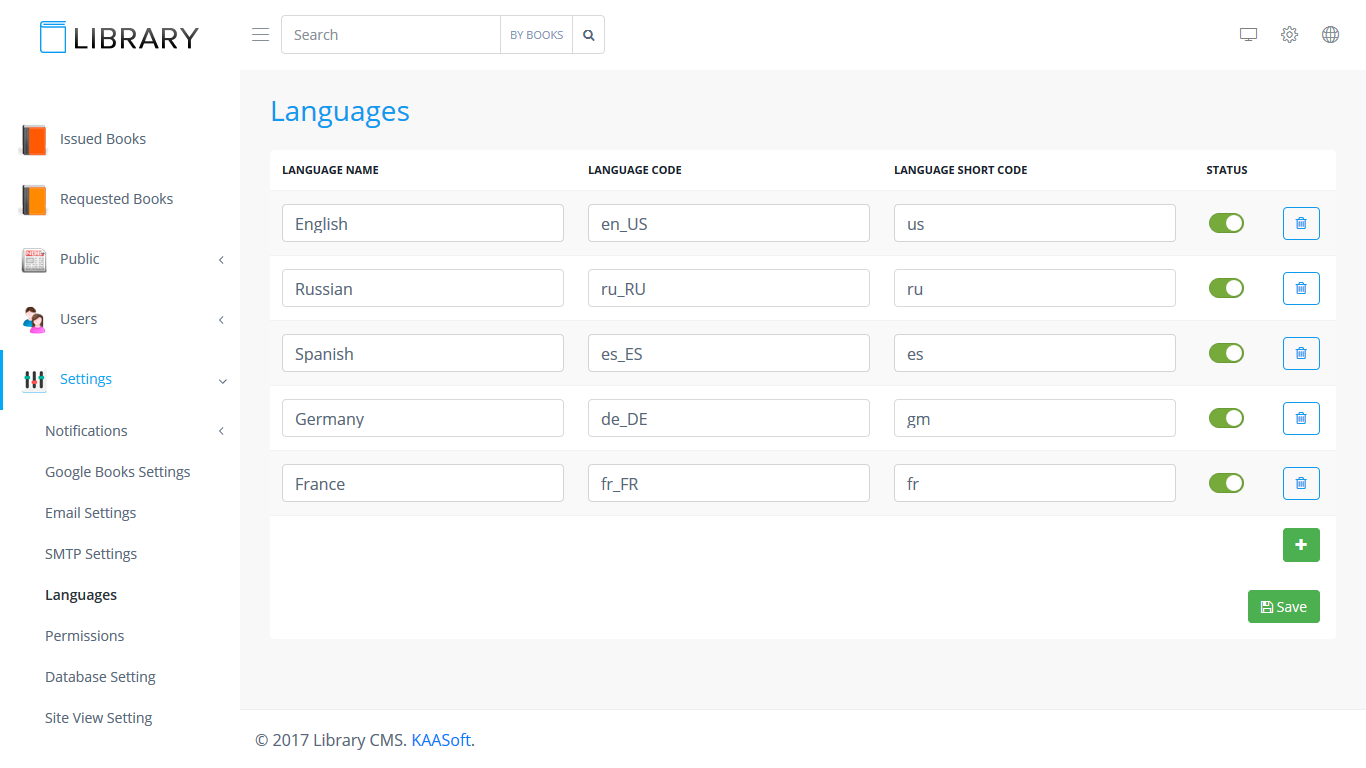
Languages
CMS includes 2 manually translated languages:
- English (en_US)
- Russian (ru_RU)
Also it includes following languages created automatically by Google Translate (they are disabled by default and can be enabled in Languages settings):
- German
- French
- Italian
- Spanish
- Portuguese
- Danish
- Chinese (Simplified)
- Japanese
To edit languages files you have to use PoEdit. You can download PoEdit from this site. It’s completely free! PoEdit supports versions for different OS (Operating System).
Translating Guide
- First thing that you should do is start PoEdit. New window should appear.
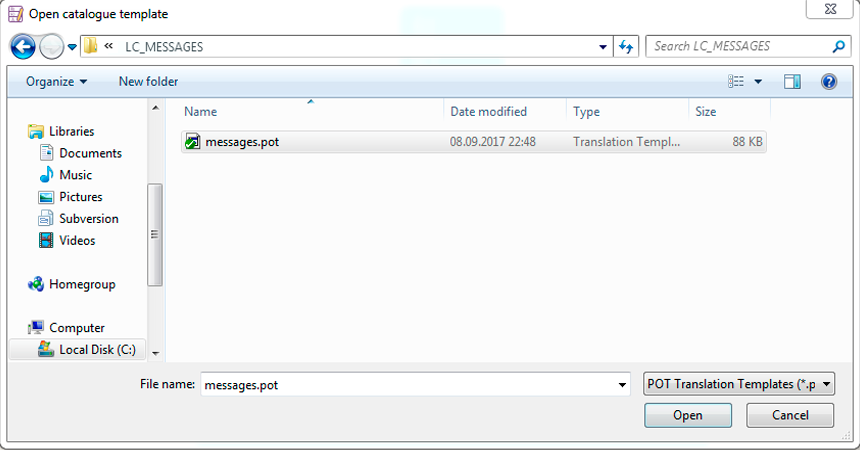
- Next thing what you should do is press File -> “New catalog from POT file…" and select in project folder locale/en/LC_MESSAGES/messages.pot.
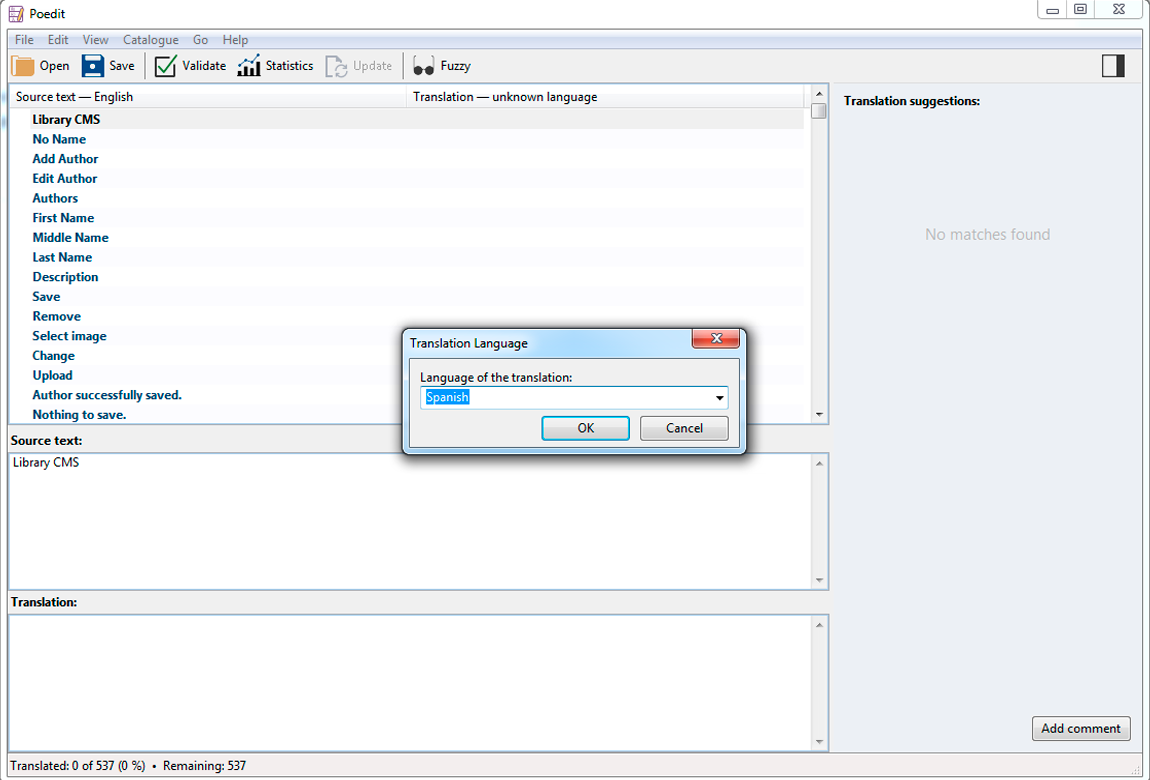
- Select the language you want to translate
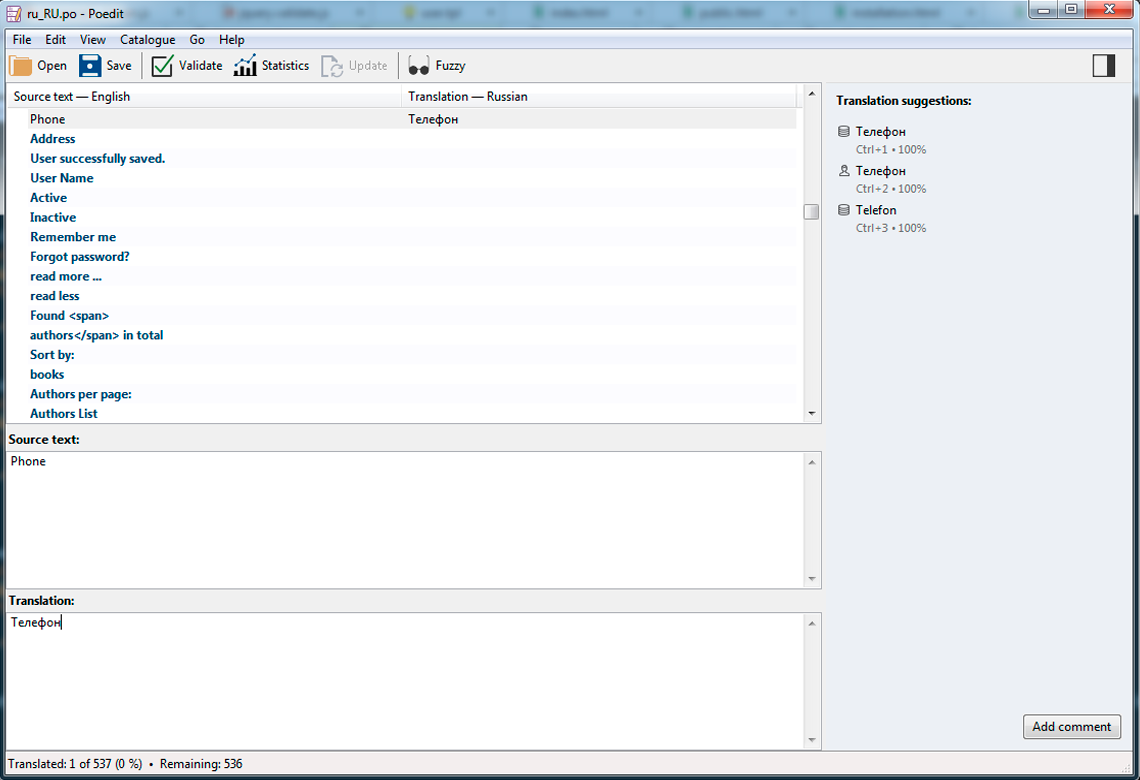
- Now you can start translating. To start translating, click on first "Source text" and put cursor in bottom textarea. Now translate, the text from upper textarea to bottom textarea.
- As you can see the new translated text automatically fills up in “Translation" column. Now we need to save our translation, to do that, press "File -> Save as..". Select the folder where to save the file, name the file and click Save. Language file should be saved as messages.po in folder "locale/ISO Language Codes + _ + ISO Country Codes/LC_MESSAGES" (for example: en_US) (you can find examples in "locale" folder)
-
Now we need to add a translation on the Languages page.
Language Code = ISO Language Codes + _ + ISO Country Codes (for example: en_US)
Language Short Code = ISO Country Codes - To apply new language you have to restart apache.
- Good Job!

Sometimes it is required to create/enable locale on your server. On Linux server it can be done by command
locale-gen, for example:
locale-gen fr_FR.UTF-8Please contact your host provider about it if you don't have ability to do it yourself.
If you find not translated phrases you have to do following: open PoEdit and go to "Catalogue -> Update from POT file..", select file locale/en/LC_MESSAGES/messages.pot. New phrases will be added to end of list.
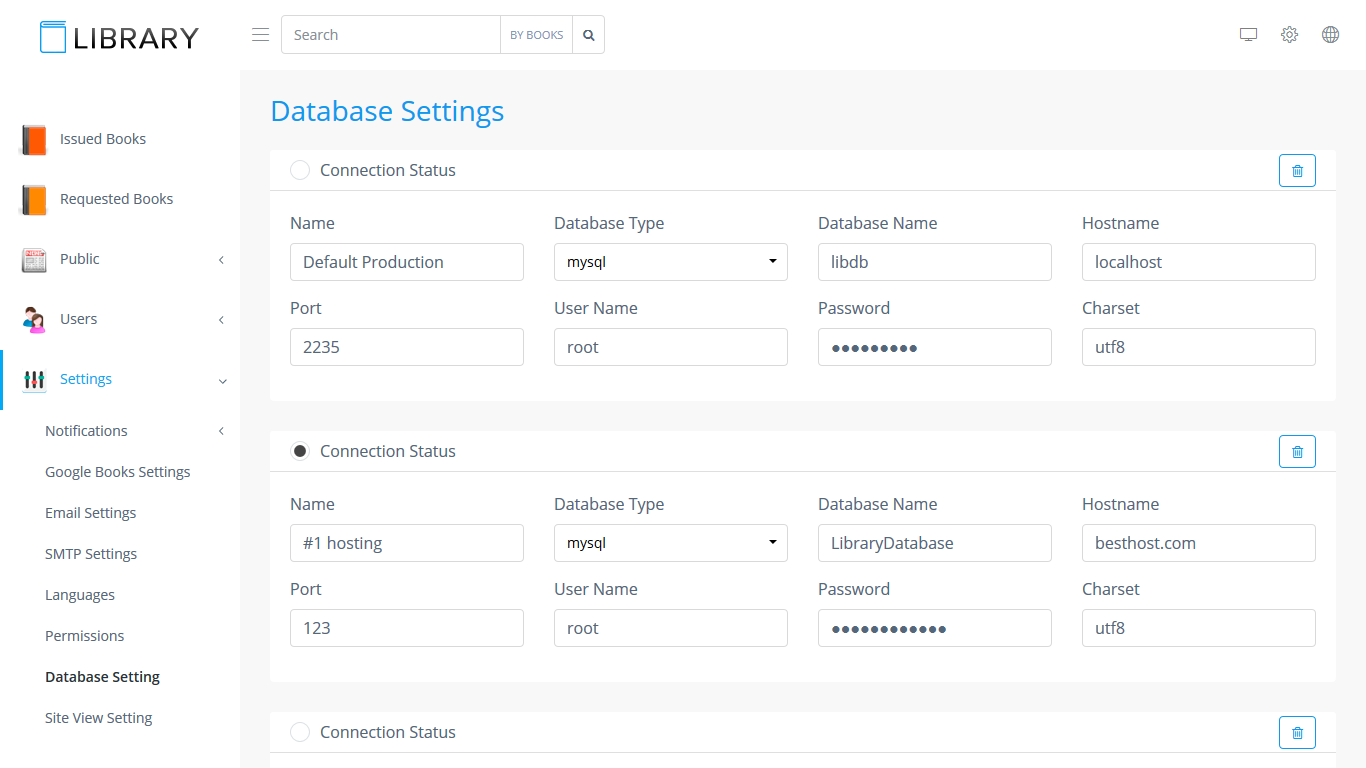
Database Settings
Here you can setup new or change existing database connection. Usually you can have just one connection, but sometimes it is required to change SQL server or use another SQL server user on the same database. In this case you can have some different database connections and simply switch between them.
Please be very carefully with database settings. Wrong database connection can broke all site.
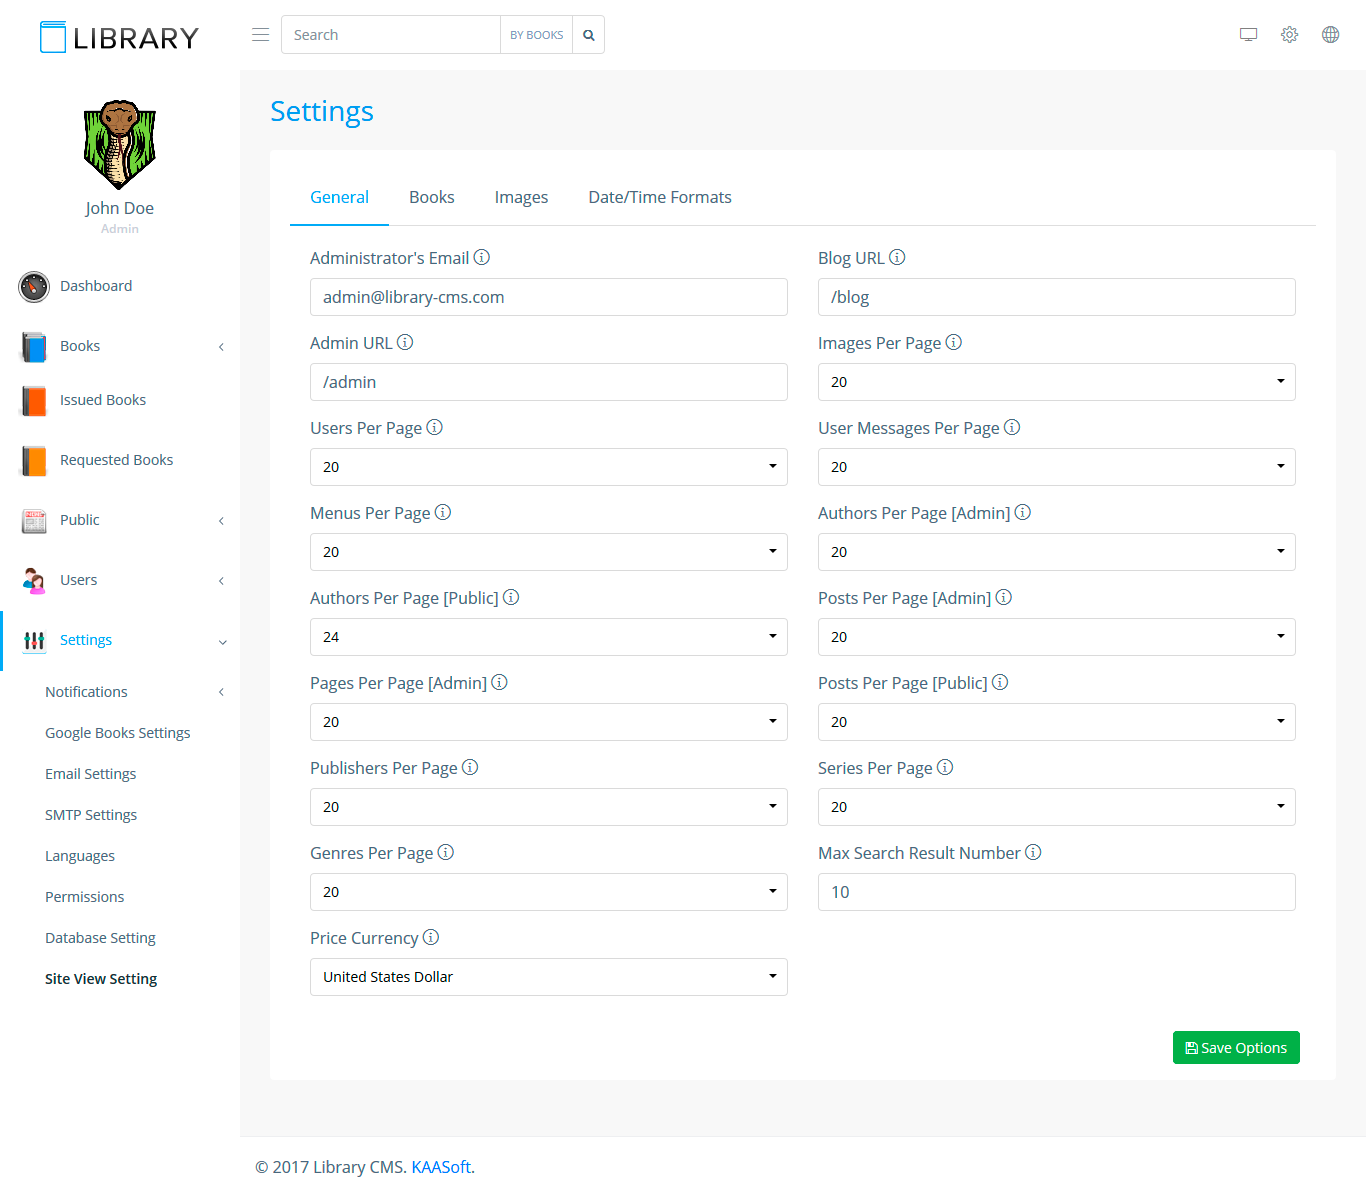
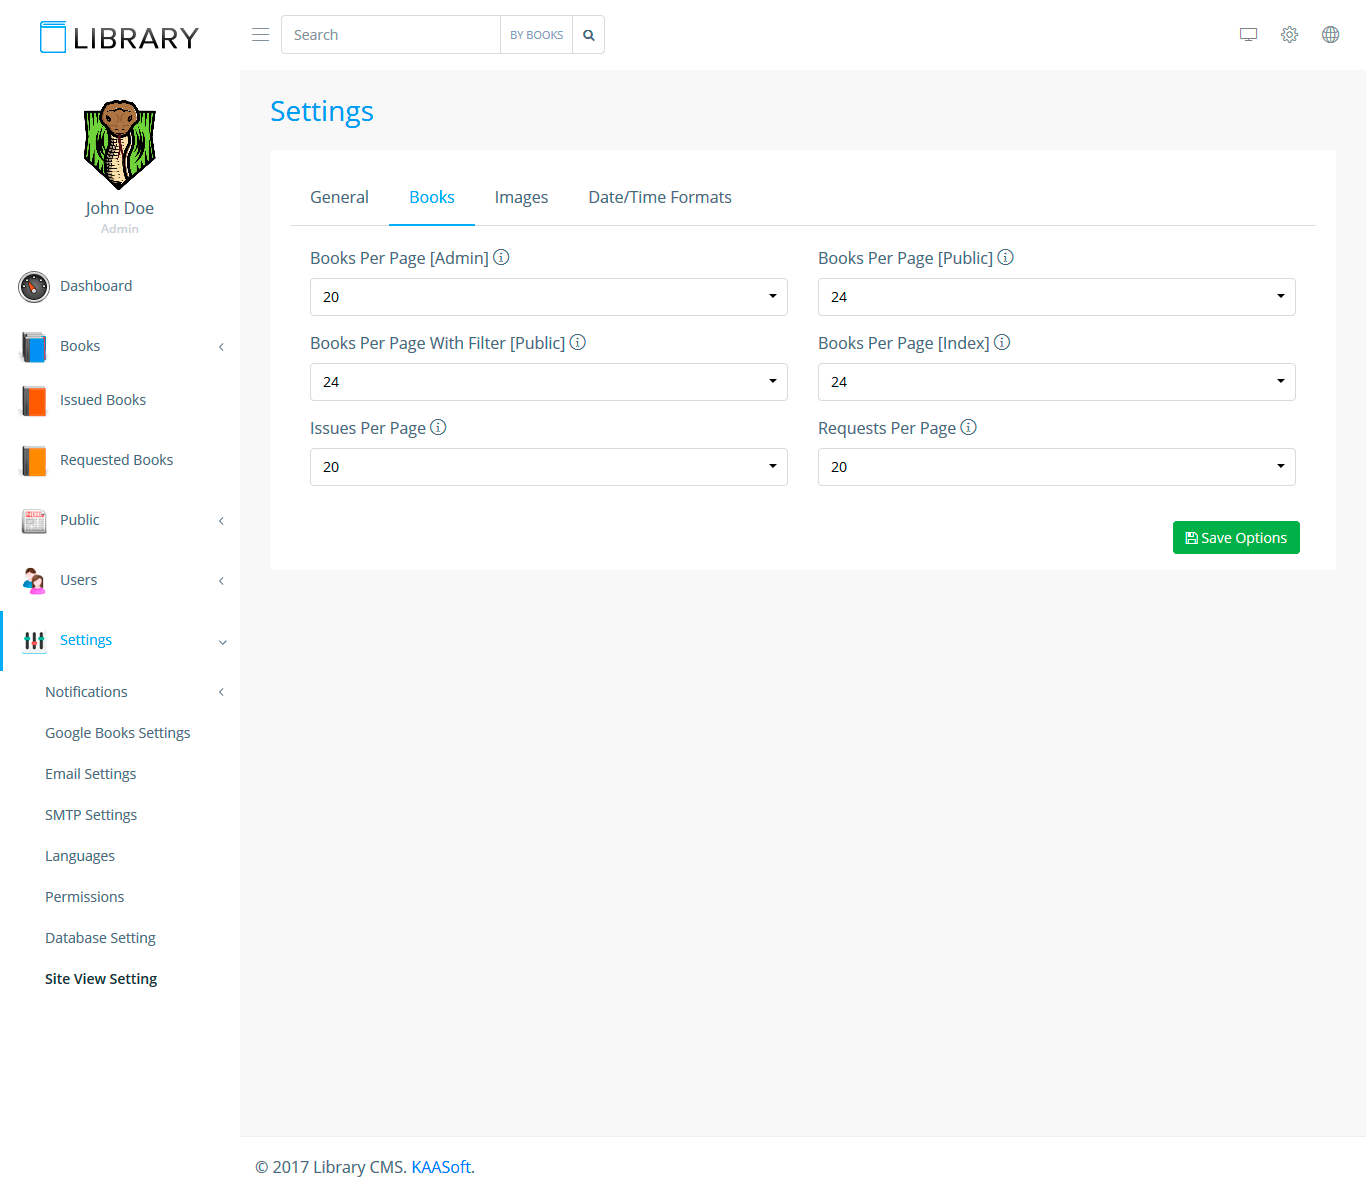
Site View Setting
Site View Settings helps you change view of site pages. Page has some predefined groups of settings:
- Genaral – some general settings like path to admin portal or blog, default currency, max number of search results and per page options for different pages.
- Books – settings connected with books.
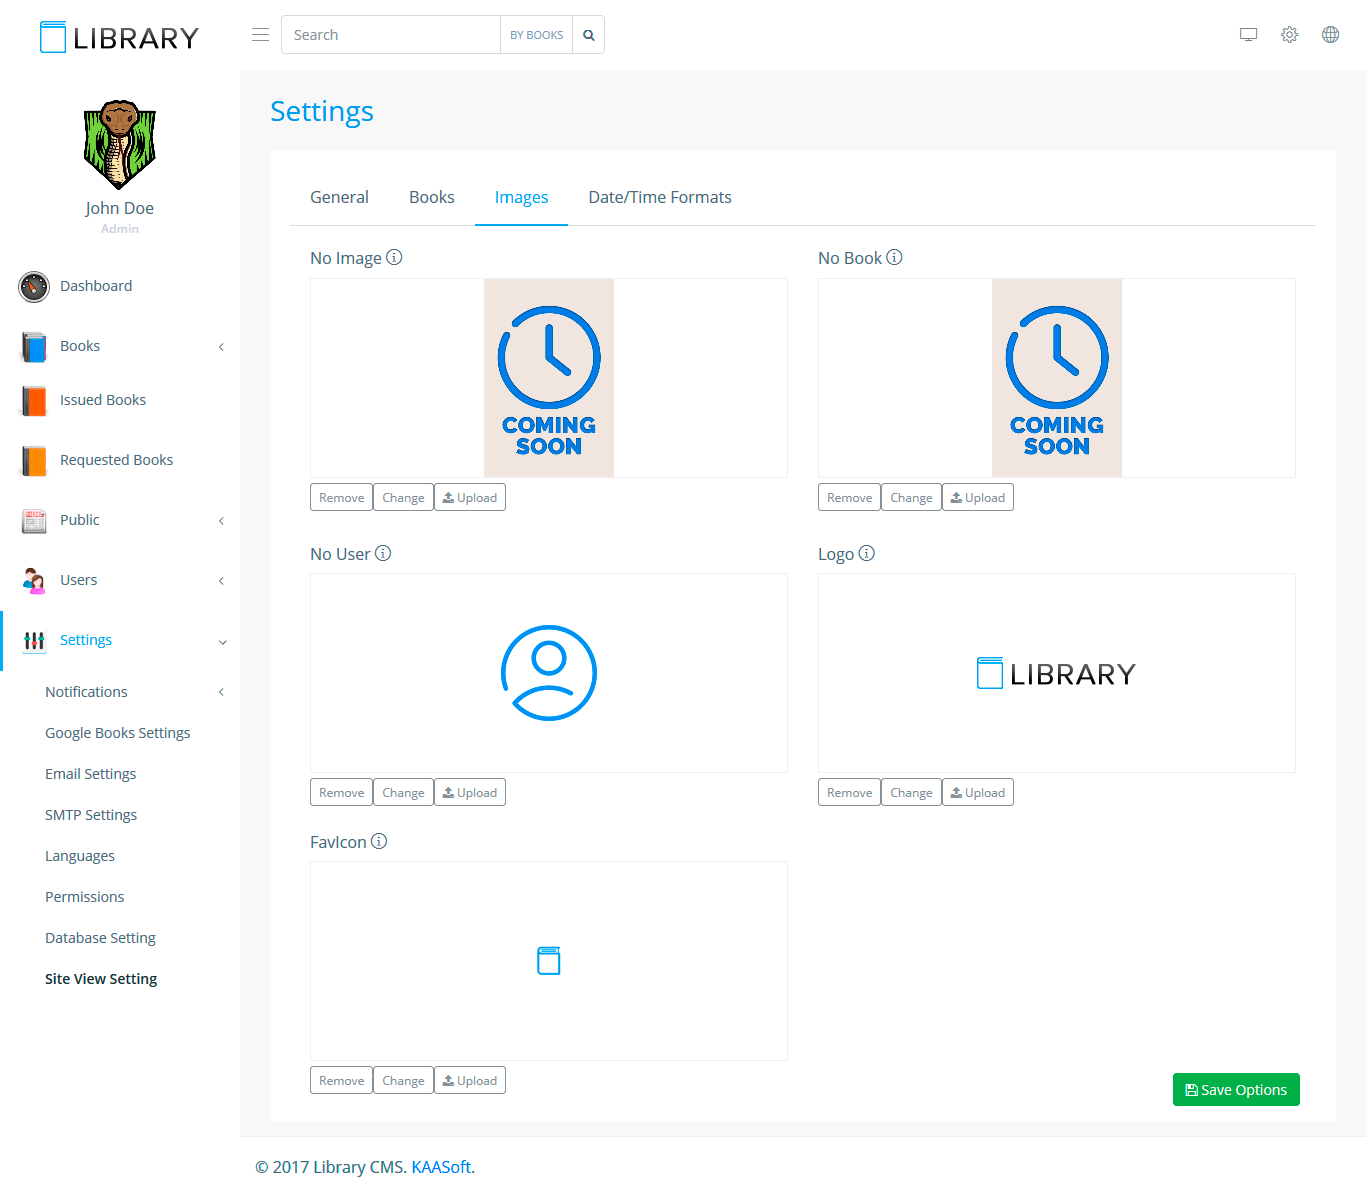
- Images – here you can define default images. It will be displayed if image is not specified.
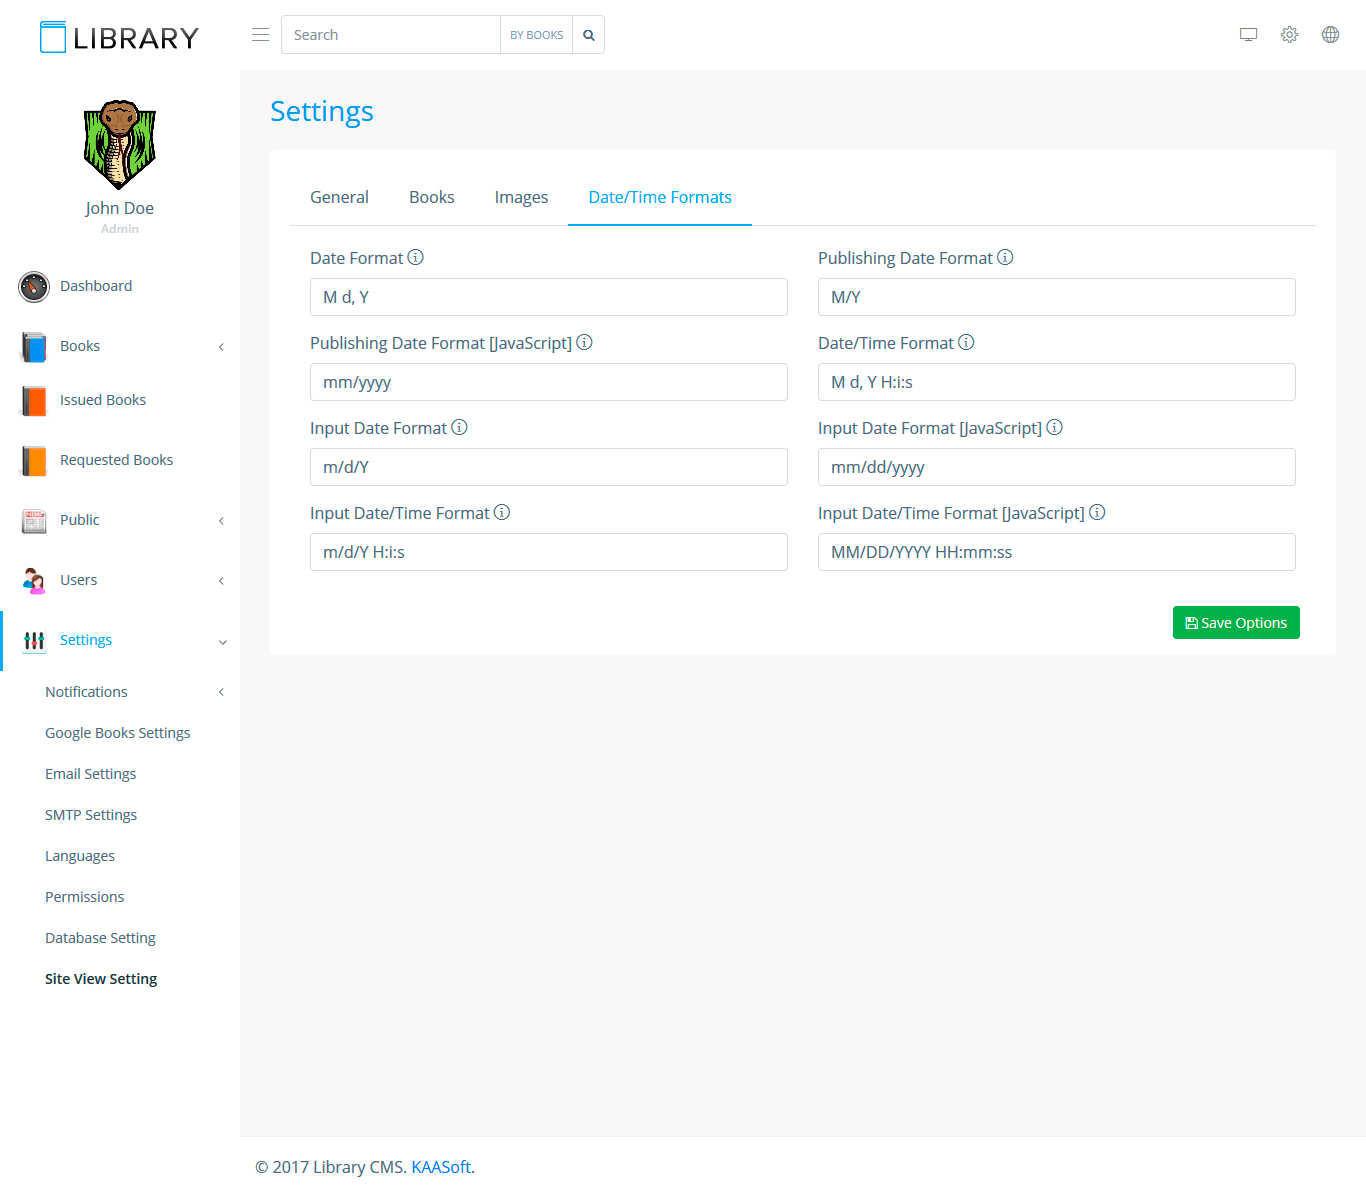
- Date/Time Formats – here can be changed date/time formats.
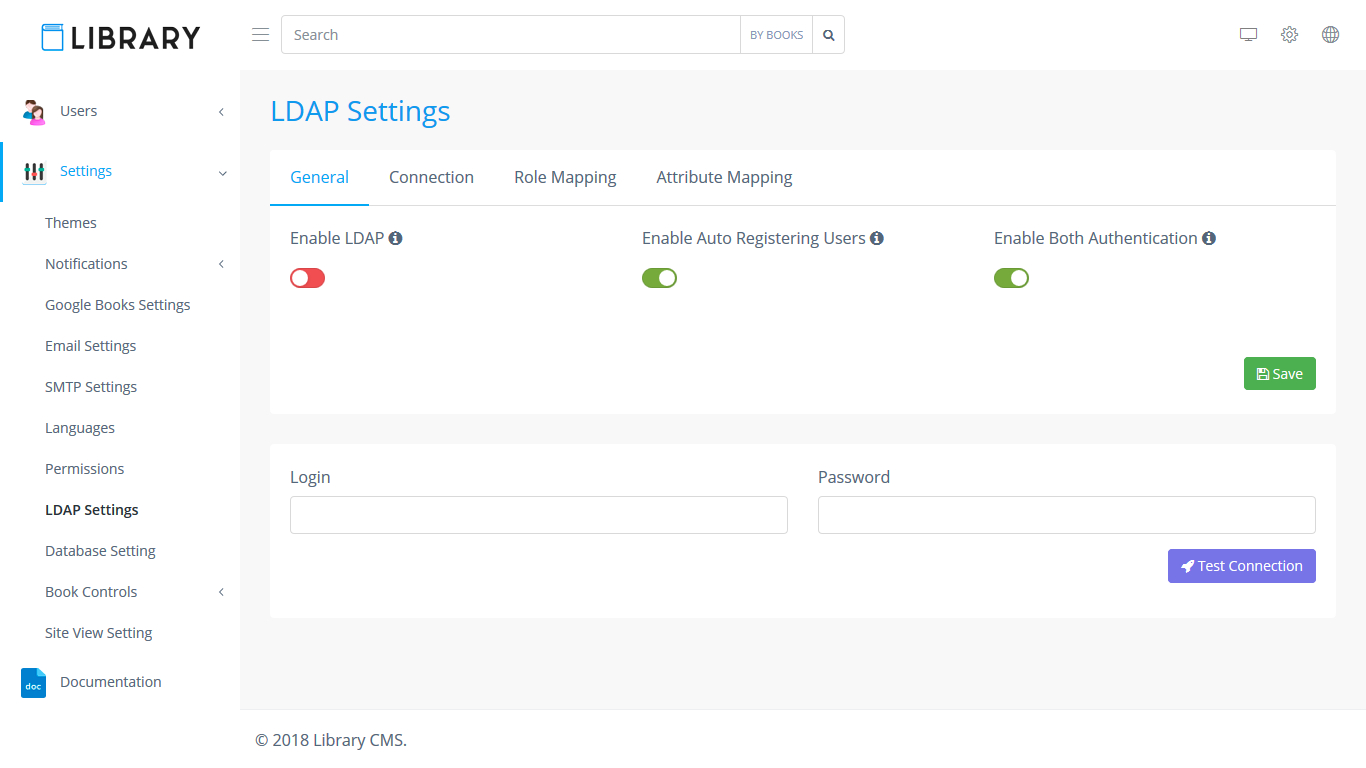
LDAP Settings
In General section you can enable LDAP settings. LDAP can work by 2 ways:
- integrated with usual database authentication. In this case database authentication has priority. It means user first of all will be searched in database and if it couldn't be found in database Library CMS will try to find it in LDAP.
- as main authentication system. In this case default database authentication will be disabled and LDAP will work only.
On Connection tab you have to define LDAP connection and LDAP admin user. Admin user should have at least read access to all LDAP users/groups and will be used to search users that will try to login.
Also LDAP user can be automatically added to database. In this case user will be stored and next time user can be logged in via usual authentication even if LDAP will be disabled.
User's details also can be got from LDAP attributes. You can setup these attributes on Attribute Mapping section.
User always should have one of following roles: Admin, Librarian or Member. To identify user's role you have to define LDAP groups on Role Mapping tab.
Server Error Handling
There is static template to display unhandled server errors. If you want to customize this template you have to edit following file: /private/Templates/admin/epicEpicFail.html. Make sure your template has following string: %error_message%. It will be replaced by actual error message. Please send us this message if you will see it (as well /logs/KAASoft.log file).